

Record the version and symptom, restart the game and Steam, verify files, test one reversible change at a time, and back up the verified save folder before reinstalling. For co-op, every player must use the same build and branch.
Use a one-change-at-a-time process. A broad “fix” that changes drivers, branches, graphics, firewall rules, and save data together can hide the cause or destroy evidence. Start by writing down what failed, when it failed, and which version was running. Then follow the matching section below in order.
Before changing anything
Record this short baseline:
- Version shown on the main menu. Photograph it instead of relying on memory.
- Mode: single-player, hosting, or joining another player.
- Exact point of failure: before the logo, at the menu, while loading a shift, after a crash, or during a specific customer or attack.
- Visible error text: copy it exactly, including any code.
- Steam branch: default/current build or a beta/private branch.
- Last change: game update, Windows update, GPU driver, overlay, controller, audio device, or network change.
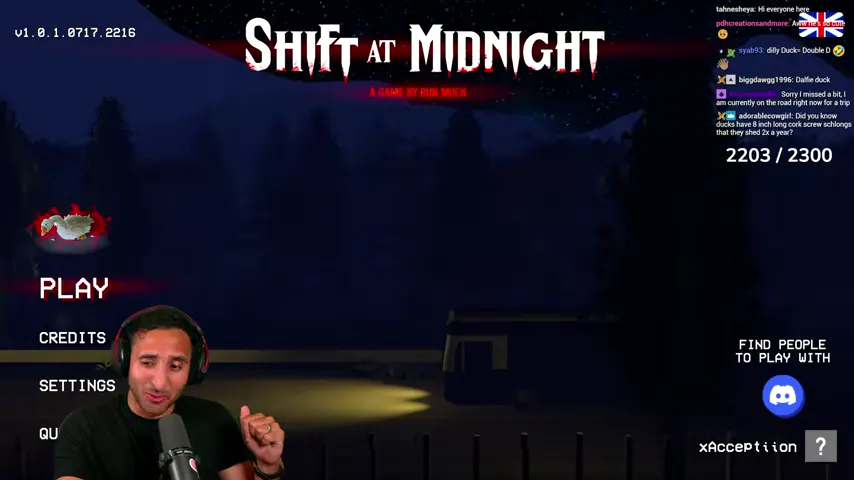
Capture the version before updating or reinstalling. A report without the affected build is much harder to reproduce.
The current official requirements list 64-bit Windows 10/11, 8 GB RAM, a GTX 1050 Ti-class GPU, DirectX 11, broadband internet, and 3 GB free space as the minimum tier. Check the complete system requirements first if any part of that baseline is uncertain.
Game will not launch, stays black, or crashes
Work down this sequence and test after every numbered step.
1. End the stalled session cleanly
If the window still responds, close it normally. If it does not, try Alt + F4, then use Steam's Stop control or Windows Task Manager to end only the game process. Do not repeatedly launch new copies while the old process is still present.
Restart Steam. If the same state returns, restart Windows once. This clears a stuck process, input capture, or pending update without altering files.
2. Confirm the current build finished downloading
Open Steam's Downloads view and make sure the game is not paused, unpacking, or waiting for a restart. Compare the menu version with the version recorded before the failure. If one teammate has a different version, solve the version mismatch before diagnosing the network.
The local official archive confirms several rapid post-release builds: a July 23 lobby-and-fixes update and a July 29 update that included unspecified crash fixes. That establishes that updating matters, but it does not prove that every crash has one universal fix.
3. Verify installed files
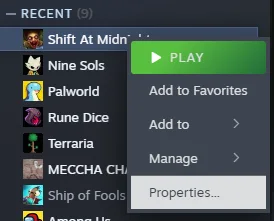
In Steam, right-click Shift At Midnight → Properties → Installed Files → Verify integrity of game files. Let the process finish, then launch once without changing anything else. Verification can replace missing or altered installation files; it is not a substitute for backing up personal progress.
4. Isolate overlays and capture tools
Close one nonessential layer at a time: performance overlays, GPU overlays, chat overlays, screen recorders, frame injectors, or hardware-monitoring displays. Relaunch after each change. Keep normal security protection enabled; do not disable antivirus or the firewall globally just to test a game.
If the game runs after one overlay is closed, re-enable the others and repeat the same scene. This identifies the conflicting layer without leaving the system broadly unprotected.
5. Update the graphics path without stacking changes
Install the current stable driver for the active GPU, restart Windows, and check that the game uses the dedicated high-performance GPU on dual-GPU laptops. Do not combine a driver update with compatibility mode, administrator mode, and several undocumented launch arguments. Those changes make a clean comparison impossible.
If a driver update caused the problem, record the old and new driver versions before using the driver's supported rollback path. Do not download an unknown driver package from a third-party mirror.
6. Reproduce the smallest possible case
Test the main menu, then a single-player shift. If single-player is stable but joining fails, move to the co-op section. If the image fails before any network session begins, continue with display, driver, and file checks rather than opening router ports at random.
Cursor or menu buttons stop responding after a crash
The official July 23 update specifically acknowledged a sequence in which some players crashed and then could no longer interact with the cursor or any game buttons. That announcement said a next minor patch would aim to address it. It did not state in that post that the issue was already fixed.
Use this order if it still happens:
- stop the stuck game process rather than clicking repeatedly;
- restart Steam, and restart Windows if the cursor remains captured;
- install the current game build and verify files;
- disconnect extra controllers or unusual input devices for one test, leaving keyboard and mouse connected;
- launch to the menu and test buttons before loading a save or lobby;
- reconnect one device at a time if the clean test succeeds.
Do not delete input configuration or save files without a backup. If the bug only appears after a particular crash, report both events as one reproduction: what caused the crash, how the game was closed, and what happened to the cursor on the next launch.
Performance drops, stutter, or delayed input
First distinguish local rendering from network delay:
- The whole image, mouse movement, and local animation stutter in single-player: investigate hardware, GPU selection, background load, heat, and graphics settings.
- The local view remains smooth but other players jump or actions arrive late: investigate the host and network path.
- The problem appears only after several minutes on a laptop: check temperature, power mode, and whether the dedicated GPU clocks down.
Then make one controlled test:
- close browsers, downloads, recording, and other high-load applications;
- plug in a laptop and select the high-performance GPU;
- note the current resolution, display mode, and quality settings;
- lower one demanding setting or the resolution one step;
- replay the same bright store route and the same dark exterior route;
- keep the change only if it clearly improves the symptom.
Do not trade away readable IDs, database text, or enemy silhouettes for a small performance gain. The game depends on inspecting faces, documents, and distant movement.
The game looks too dark
Dark exterior routes are intentional, but important geometry should still be distinguishable. Compare a known route before and after each display adjustment.
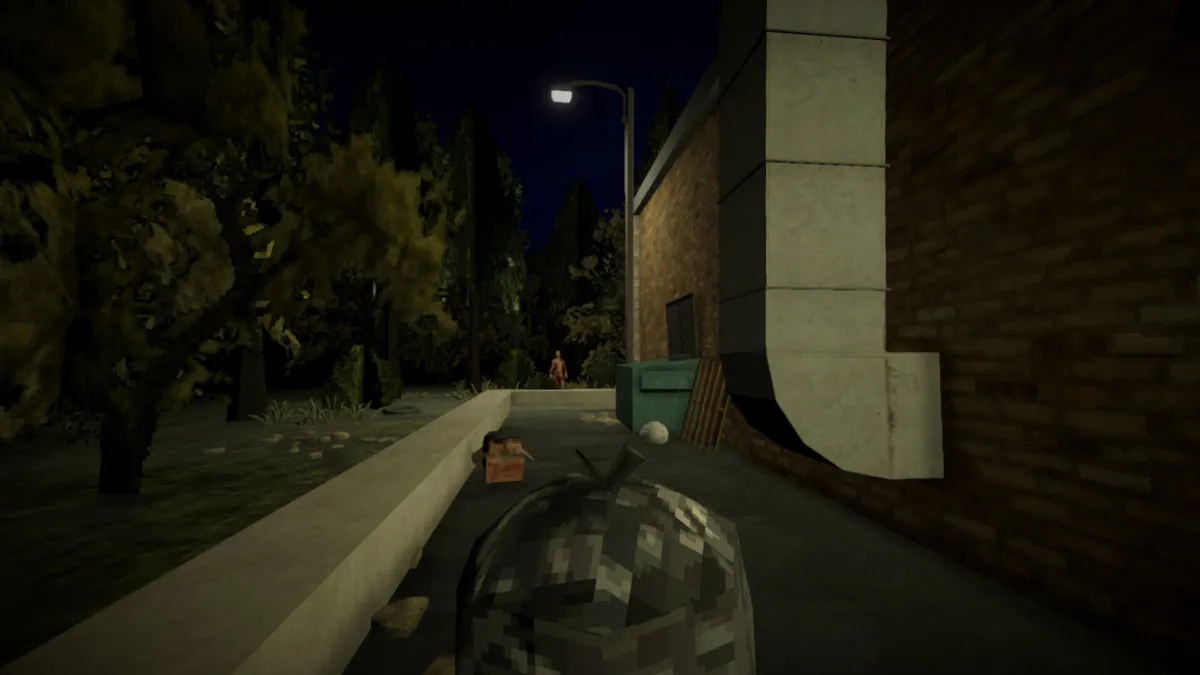
Use the same wall, lamp, foliage, and path as reference points. Keep a before image so “brighter” does not become “washed out.”
- verify that the monitor is using its expected picture mode and brightness;
- check the settings exposed by the current game build rather than assuming an old option list;
- change only one brightness, gamma, display-mode, or resolution control at a time;
- retest both the dark exterior and the bright checkout screen;
- if Windows HDR is active, compare one test with the current Windows HDR setting and one with it changed, then keep the more readable result.
The current records do not confirm a game-specific HDR calibration target, so this guide does not prescribe one. Avoid third-party filters that alter evidence colors or make bright UI text unreadable.
Audio, proximity voice, and the music-box cue
Separate three audio paths: game effects, voice input/output, and the Jack-in-the-Box gameplay cue.
No game sound or wrong output device
- open Windows volume mixer while the game is running and confirm the game is not muted;
- select the intended Windows output device, then restart the game so it can reacquire that device;
- check the custom volume controls exposed by the current game build;
- remove one virtual audio device or mixer from the path for a direct-device test;
- test the main menu and a normal store sound before diagnosing the music box.
Steam's current feature record lists custom volume controls and stereo sound. It does not document every third-party spatial-audio or virtual-mixer configuration.
Voice chat works inconsistently
The game is designed around proximity chat, so a distant teammate may be quieter or inaudible even when voice is functioning. Stand together for the first test.
- confirm the expected microphone and output device in Windows;
- allow desktop applications to use the microphone in Windows privacy settings;
- close any other application holding exclusive control of the device;
- test voice with the host and one joining player standing beside each other;
- change host if only one lobby exhibits the problem;
- record whether the microphone indicator reacts, whether teammates hear you, and whether you hear them.
Do not use a third-party voice call as proof that proximity chat works; it bypasses the game's voice path.
Music-box sound is quiet or seems missing
The July 23 official update says the Jack in the Box was made louder. In gameplay, the melody is also a directional warning: find the box, rewind it immediately, and do not let the song finish three times.
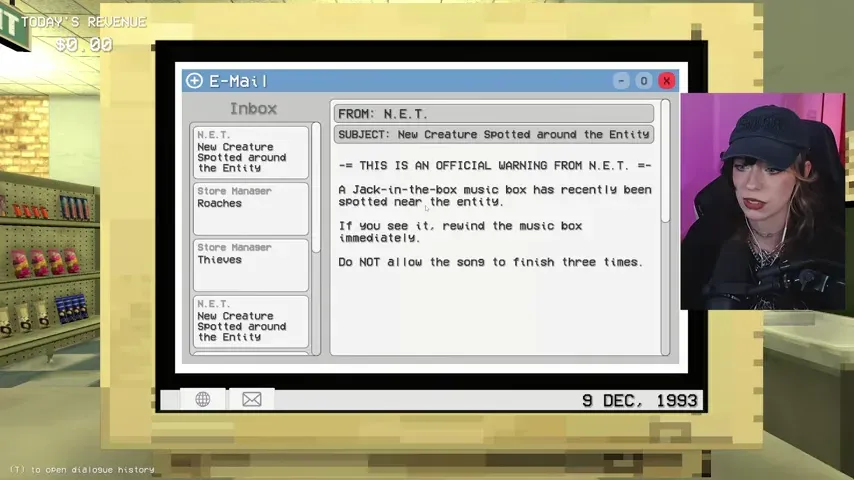
Confirm normal game effects first. If all effects are present but this cue is still missing on the current build, record the night, location, and version.
Do not raise the entire system volume to an unsafe level. If the music-box event has already started, follow the Night 9 walkthrough while preserving enough volume to hear attacks and teammate voice.
Cannot create, find, host, or join a lobby
Start with the current default build:
- close the game on every PC;
- confirm Steam has completed all downloads;
- confirm every player is on the same version and same branch;
- have the host create a new lobby rather than reusing a failed session;
- invite one player first, then add the remaining player;
- if joining still fails, change host;
- compare with a single-player shift to isolate local stability from networking.
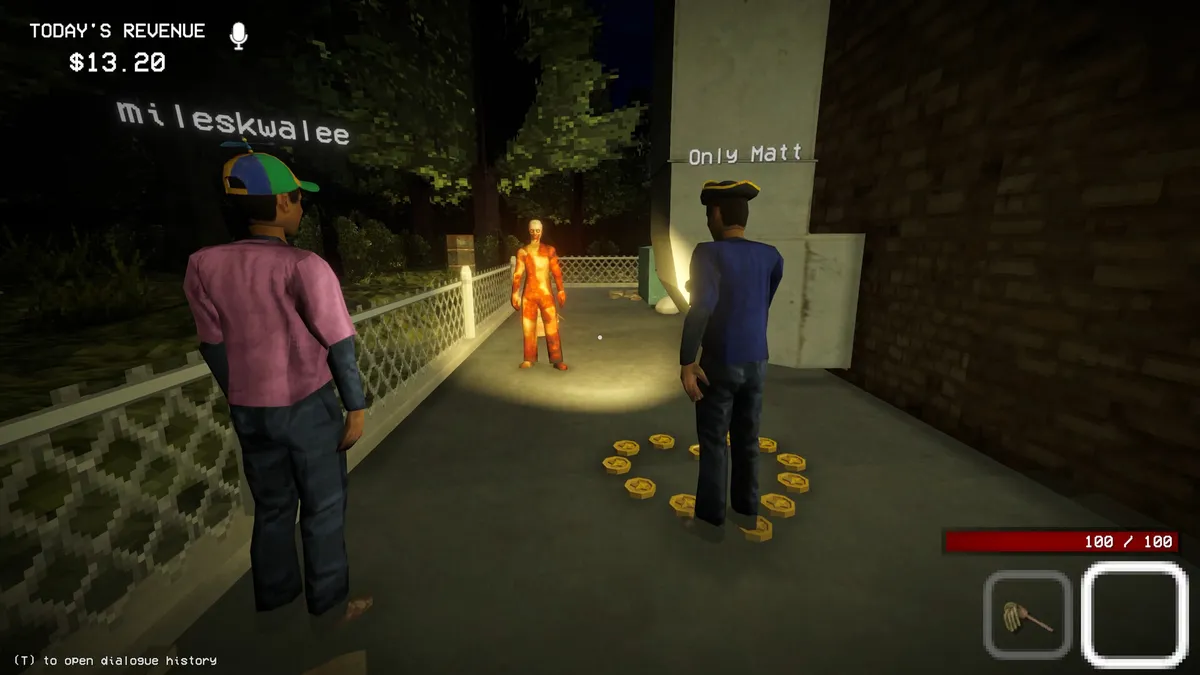
A smooth local scene with delayed teammates points toward the session or connection; a stuttering local camera points toward the PC.
Pause downloads, cloud backups, and high-bandwidth streams during the test. Prefer a wired connection where practical. Allow Steam and the game through the existing Windows firewall prompt on the appropriate private network, but do not disable the firewall globally and do not forward undocumented ports.
Version or branch mismatch
A player on a private branch cannot reliably test with players on the default branch. In Steam Properties, check the Betas or Game Versions & Betas area on every PC. Move the whole group to the same branch, let every update finish, and restart Steam before recreating the lobby.
Russia lobby fix and the historical network branch
The release archive contains two important facts:
- The July 23 6 PLAYER LOBBIES + FIXES update says it fixed players in Russia being unable to create joinable lobbies.
- An earlier CAN'T JOIN A LOBBY? announcement provided the private code
networkissuesto unlocknetwork-issues-patch, with the instruction that every player must opt in. It called that branch a temporary workaround while a main-version fix was being developed.
Because the main build later received a Russia lobby fix, first test the current default branch. Treat the private branch as a historical fallback, not a permanent performance upgrade. Use it only if the current official instructions for the affected build still direct you there, move every teammate together, and return everyone to the default branch after the test.
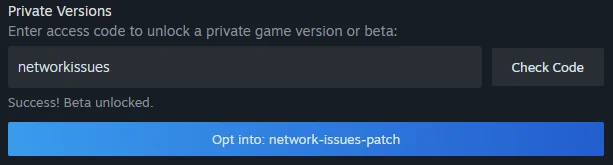
These screenshots document the official release workaround. Interface labels can change, and the current default build should be tested first.
Lobby size is not a stability fix
The July 23 build added a selectable maximum of six players, but the same announcement says the game was designed and marketed around a maximum of three and warns that larger sessions may become too chaotic. Diagnose a failing first playthrough with the designed one-to-three-player setup. Increasing the lobby size cannot repair a connection problem.
Save and Steam Cloud backup
The verified Steam cloud configuration for app 3722330 records Windows save files below the base directory %USERPROFILE%/AppData/LocalLow/, inside the folder Kwalee/ShiftAtMidnight/.
with the pattern:
*.data
That path is supported by the current local configuration record; this guide does not guess a different Documents or Steam installation-folder path. The same configuration records a 9.54 MiB quota and up to six cloud-managed files, but file count and contents can change with a later build.
Make a safe backup
- finish or exit the current shift normally if possible;
- close the game completely;
- wait for Steam's synchronization activity to finish;
- open the path above by entering it into File Explorer's address bar;
- copy the entire
ShiftAtMidnightfolder to a new dated backup folder; - confirm the backup contains the
.datafiles before making any destructive change; - keep the original in place while testing verification or reinstall.
Do not edit or restore a save while the game is running. Do not assume cloud synchronization is a backup of every historical state: a damaged or unwanted current file can also synchronize.
Diagnose missing or rolled-back progress
Compare timestamps and sizes in the live folder and the dated backup. Record whether the problem followed an offline session, a cloud-conflict prompt, a branch change, or a crash. Preserve both copies before choosing either side of a conflict. If you must test a restore, first copy the current folder again, close Steam and the game, then restore one complete known-good set rather than mixing individual files from different moments.
When verification is enough—and when to reinstall
Verification is the correct first repair for missing or altered installation files. Reinstall only when all of these are true:
- the current build is fully downloaded;
- verification completed without solving the repeatable failure;
- the driver and active GPU are known;
- overlays have been isolated;
- single-player versus co-op has been compared;
- saves have been backed up and checked;
- the exact error or reproduction sequence is recorded.
Before uninstalling, return from any temporary private branch to the intended branch and keep the dated save backup outside the game directory. Reinstalling the program should not be used as permission to delete AppData. After reinstall, launch once with the simplest setup, then reconnect controllers, overlays, virtual audio, or private branches one at a time.
What to include in a support report
If the issue remains, open the support page and prepare one compact report:
- game version visible on the menu;
- Steam branch and whether every co-op player matched it;
- Windows version, CPU, RAM, exact GPU, and GPU-driver version;
- single-player, host, or joiner role;
- lobby size and region only if relevant to the network symptom;
- exact steps from a fresh launch to the failure;
- complete error text and a screenshot or short recording;
- whether verification found replacements;
- whether the problem survives a clean test without overlays;
- for voice, the selected input/output devices and microphone-indicator result;
- for saves, file timestamps and the event immediately before progress changed.
Do not publish personal identifiers, private lobby codes, account tokens, or an entire Windows profile folder. If support requests a log, use the path they specify for the current build; this guide does not invent a universal log location.
Fast symptom map
| Symptom | First controlled test | Avoid |
|---|---|---|
| No launch or black window | Restart Steam, verify files, test without overlays | Random launch options and deleting saves |
| Crash followed by dead cursor/buttons | End process, restart, update, verify, test menu first | Repeatedly opening more game processes |
| Local stutter in single-player | Close background load, confirm dedicated GPU, lower one setting | Changing every graphics option together |
| Smooth local view but delayed teammates | Match build/branch, recreate lobby, change host | Treating graphics settings as a network fix |
| Dark exterior unreadable | Compare one display change on the same bright and dark scenes | Washing out the whole image with filters |
| Voice missing | Stand together, check Windows devices/privacy, change host | Testing only through an external voice call |
| Music-box cue missing | Confirm current build and normal effects first | Assuming the warning is optional ambience |
| Progress missing | Close game, preserve live folder and dated backup, compare timestamps | Mixing files or restoring while running |
| Join failure in Russia | Test current default build and same branch on every PC | Leaving one player on the old private branch |
The goal is not to try the largest number of fixes. It is to preserve progress, isolate one variable, and leave a report that can be reproduced. Check current updates after any new build, because a confirmed patch fact can replace a historical workaround.
Keep going